Showing posts with label garden. Show all posts

Sunday, 11 May 2014

the wall

* I wrote this AGES ago, to go with The Hole, but my photos were stuck on the computer!

The slab and the retaining wall were a much simpler process. Especially since we ended up getting a bricklayer to do it for us.

Originally we had planned to lay the slab with the help of a friend, and build a pine retaining wall ourselves. But after researching it we realised a pine wall would only last about 10 years and would then probably need replacing, but a brick wall could last forever. So it was more expensive up front, but it was done right, and wouldn't rot away in the future and need redoing. Also, we were so over that area at the time, and had both gone back to work so it would have taken us multiple weekends. It took the bricklayers 2 mornings over about a week.


They came one day, and laid the slab, let it set for a few days and then came back and built the wall.


We did lay the drainage ourselves between the wall and the soil (side note-there was no drainage laid around our house slab, so when it would rain heavily, or the rain would come the right way, it would lie up against the slab and seep through into the garage. All sorted now, but what were they thinking??).

We lay some agi pipe between the soil and the wall. We made sure it had a slight fall so the water would drain away where we wanted it to go, and then covered it with drainage rock.


So now we are researching tanks at the moment. We are tossing up between a few-maybe 1 big tank, maybe 2 smaller ones that hold more than the 1 big one, not sure. We will put it in before next summer, but after we paint. Eventually we will put a new slab under the hot water system, but we will wait until it needs doing.

It already looks so much better, and tidier. As this is at the front of our house (but below street level-check out the first photo) we think we will plant something to hide the tanks. It will probably be in pots so we can cover up the clay and drainage, and finish the area off.


Wednesday, 26 February 2014

the hole

Before you start reading-this isn't a pretty post. At all. This is a post about dirt, and digging, and sweat, and tears, and blisters, and more dirt and more digging. Just letting you know.

We've planned to put a water tank in since we moved in, and now that we have built our vegie garden we figured there is no time like the present. We had a bit of a nothing area at the front of the house, it's under the front verandah, and set down quite a way, nothing much grew there, it's where the hot water system lives. 
Right near the start of digging
Near the start. Sorry about the iphone pictures. There was no good
photography happening...
But we had to dig out some dirt so we could lay a slab, build a retaining wall and sort out some drainage. And by some dirt I mean a whole lot of dirt. And by dirt I mean thick, heavy, often rock hard clay. 

For three days 2 or 3 of us dug. Luckily for us L's brother was staying with us at the time and helped us out. We mostly used a pick and shoveled the clay up into a wheelbarrow. The boys then pushed the barrow along the path, and up the driveway. Eventually we did hire a jack hammer for a few hours when the soil got really hard.
Almost done

We threw the dirt up high into the wheelbarrow on top of the path 
Every muscle in my body ached. I grew callouses and blisters. By part way through day 3 I couldn't do any more. I was so exhausted and sore and just started crying. To be fair L didn't ask me to help, I offered. And he didn't think I would actually stick it out. He was pretty proud and impressed I think. 


But we did it, we got it slab and retaining wall ready. I don't think we will look at a shovel for a long time. I'm now using it as a motivation tool when my brain is telling me that I can't go on when I'm exercising or doing yoga, that I'm too tired or too hot or that I can't do that. Now I can tell my brain that I dug a hole for three days, that I lifted shovels of dirt into a wheelbarrow above my head, if I can do that, I keep going, or have a go at any yoga pose. Your body is so much stronger than your mind gives it credit for!! 

Have you ever started a job that you were determined to finish, even though it was so hard?

Sunday, 9 February 2014

our vegie patch

One of our goals for this year (and last year, but shhhh) was to do 'something with the side garden'. Last year we pulled out the lamandra (leaving us with a big expanse of white rocks) and built a wooden fence and gate, which I just love.

But now....

L had some time off over the holidays and built 3 raised beds for us. We live on the side of the hill with lots of retaining walls, and have come to realise our soil is terrible. It's thick clay, has little drainage and no goodness. So for us raised beds are the way to go so we can add in some goodness and drainage.

Before: Lots of white rocks, a few big rocks that needed busting up, and lots of pots. 


Compare the size of the rocks to the jack hammer and wheel barrow. Yep

First up was a garden bed made out of treated pine. We just used a few plans we already had that were in pots. The pots in front are lily pillys, waiting to be planted on the other side of the fence. 


Then two big, deep vegie gardens. These were made out of hardwood (treated pine not being a great idea for vegie gardens with the leeching of the chemicals). They aren't quite finished yet, there is a narrower plank to sit along the top of the walls so we can place pots, rest vegies, sit down.


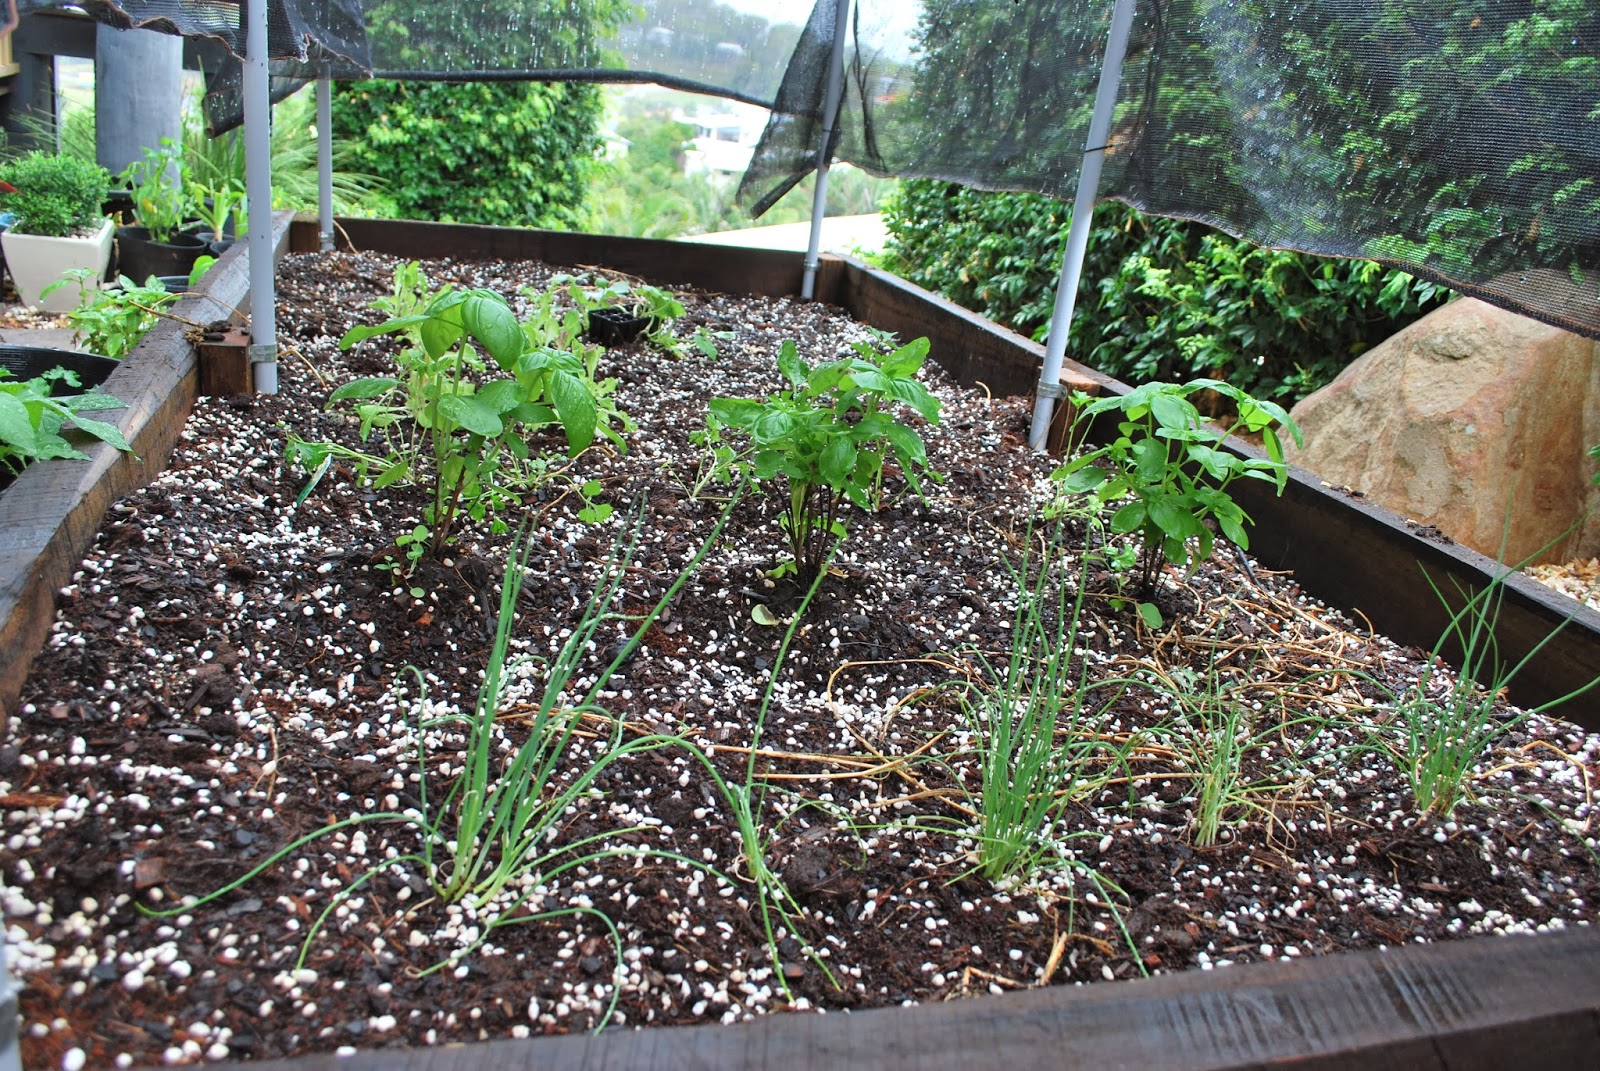
This one has a cover to protect things like lettuce and herbs from the sun, especially when they are young. It's just too hot here for most of the year for them. We will also plant some seedlings into pots to establish them, and then replant into the garden. We lots a few zucchini seedlings early on that way-just too hot!

We have planted herbs, lettuce, kale, tomatoes, capsicum, cucumbers, zucchini to start off with. The stuff we eat a lot of, or the stuff that we buy and doesn't last in the fridge more than a few days (herbs and bags of salad I'm looking at you!).


The trellises on this one will be for zucchinis and cucumbers to grow up, rather than out.

We used used lots of good stuff in our soil to retain water and add in goodies-rock minerals, compost, manure, coconut coir, worm castings, lucern, with some seasol, worm tea and molasses mixed in for good measure. 

Now we just need rain! :) It's a big improvement on my pot vegie patch, but it did teach us a lot about what we should and shouldn't do before we went for the more permanent and expensive beds.

How have your vegie patches been going?

Sunday, 13 October 2013

terranium

Hi guys,
I took a bit of a social media break. I was tired and run down after the wedding, and the crazy lead up, and just needed to simplify everything for a few weeks. I've literally not been sick for over 2 and a half years (one of the benefits of working in special ed-super strong immunity!) but I entirely lost my voice for a week! So lots of sleep, yoga, beach, walks, reading, outside time, Homeland and greens has hopefully put me back on track!

Now the wedding is over, we have a heap of house plans that are ready to go! The paintbrushes and the drill have been going overtime! You might have seen over on instagram that I've started the mammoth job of painting our verandah railings.  So time consuming and fiddly! I'll keep going when the wind dies down.

I've been a little in love with terrariums at the moments, so made one yesterday afternoon. It was super easy and quick.
I bought a glass container from a cheap-shop. This one actually had a lid originally.


I added rocks for drainage-I just used the white rocks we have on hand (we have trailer loads of them in all of our garden beds!), and potting mix. I visited a local market and picked up some cheap succulents. I tried to pick a few different colours, and leaf shapes, and heights. Some of the little pots I bought had some rocks on top, so I scattered them around the top of the terrarium too.


I'm not entirely happy with it, and may actually re-do it. I think I needed smaller rocks on the base, as the layers between the rock and the soil isn't as defined as I would like, but I might not too.


I ticked something off my pinterest to do list-yay!

Monday, 30 September 2013

i think i'll eat some...

I don't think I've really blogged about our little pets. Unfortunately, it isn't a sweet little puppy (yet!!!), or a fluffy little kitten. It most definitely is not a bird!!
link
Look at those eyes...
Couldn't start with a yucky picture!!
It's worms. Hundreds of the writhing, slimy, wriggling things. We have a worm farm. 
It started off at school last year when our SOSE unit was about waste management, and our Science unit was about bugs. What else to do but make a DIY styrofoam box worm farm. It was more about keeping the worms alive-what living things need to survive, what they eat, how to treat them, similarities and differences with other bugs we studied, feeding them our food scraps and a bit of a sensory experience. We weren't using the castings or worm juice. At the end of the year I bought a proper worm farm from Bunnings, and brought them home. 

They are so easy to care for, and actually give back too! We have a container in the fridge that fills up amazingly quickly for two people who are away all day! At the moment our worms are eating lots of egg shells, banana peel, strawberry ends, kale stalks, as well as all of our general vegetable waste-peelings and ends-carrots, lettuce, zucchini, beans, potato and sweet potato. Basically any fruits and veggie that isn't too acidic-so no citrus, tomato, kiwi fruit, onion and the like.  We just chop them up so they are fairly small bits. 


I feed them every 2-3 days, burying the food a little to stop mice and flies and the like, and give them a bit of a water if the 'blanket' on top is feeling a bit dry. Any excess water drains though to the bottom, and I collect the tea to use on our veggies, herbs and citrus and chilli bushes for some extra nutrients, diluted to about 1:10. I try to alternate worm tea and seasol. 

I also used the worm castings (basically the soil and food waste they have chewed through) to mix in with potting mix when I plant, especially for our veggies and herbs. It also helps to bring the level of soil down in the farm (as you are constantly adding matter, and the worms are aerating the soil). 

I'd really recommend a worm farm-it was great for the kids I taught, it's a fantastic use for all of that food waste that you create (and it's shocking how much you go through). I also don't feel as bad about getting rid of a rubbery carrot buried in the fridge when I can feed it to the worms. 
Do you have a worm farm, or a compost bin? What happens with your food waste?
I'll post something pretty next!! Promise! :)

Friday, 20 September 2013

veggie pots

I mentioned here and here that we had planted some veggies in pots. 


Sometime soon we will build some raised garden bed, but for this season (unless we start quite soon!) we will grow them in pots. I'm actually really pleased we went ahead and planted in the pots, because after just a day or two, we moved the pots from their original location (where we were thinking of building the raised beds) to where they now sit. Their new spot gets a few extra hours of sun each day, so that will be where we make our raised bed. This side garden is just down a set of external stairs from our kitchen, so will be nice and close when it comes time to harvest.

We used a few bags of potting mix, and added extra goodies to it, including dynamic lifter, some kick along, and some worm castings, from our worm farm. We also used some Seasol to give them some extra nutrients. 


Probably should have worn gloves...
We planted some new basil, coriander, parsley and mint-we have grown these for years, but they were kind of at the end of their lives, so we started fresh. We use them all the time in cooking. 
We also chose to plant mixed lettuce and cos seedlings, as well as kale, tomatoes and capsicums. We figured they will be the most useful to us, and will grow well in pots. Hopefully next year we will be able to expand a bit more. 


Our lemon and lime trees already have baby fruits on them, and our chilli bush has lots of green chillies just waiting to ripen. Unfortunately, last year our chillies all were eaten by birds as they ripened, so we have hung some CDs this year, in the hope that the reflections will  scare them off. Will see how we go. 


Have you every tried a veggie patch? How did it go?


Wednesday, 18 September 2013

we have a gate

Thanks for the wedding love! I thought I would break it up a bit (while I wait for my professional photos) and get back to the side area we have been working on.

Our fence is finally finished-we have a gate!


 I'm actually really happy with how this area is coming along, especially because we still have quite a bit to do to it.

**

Despite the carpets of rocks down there it is feeling quite green at the moment, now that spring has definitely sprung.


Our next steps down here are 
-build some raised garden beds down near the bottom of the garden for some veggie patches
-hire a jackhammer to break up and remove the big rocks
-remove the small white rocks (we will use some to fill out the bottom of our garden beds to provide drainage, but might put an ad on gumtree giving them away if someone else removes them!!)
-lay grass
-plant out the gap between the rock retaining wall and the fence **see photo above

Currently our veggie patch is a pot setup, until we get around to building our beds. Most of the pots you see in the photos are fruit trees-a chilli bush, a lemon tree, a lime tree, and lots of smaller pots, but we were given a climbing jasmine, and L put in some eyelets and wires for it so it can grow. 


Here is a quick before, so you can really appreciate the difference down in this little area. I didn't even photograph this area in all of it's original glory-I must have been too horrified!

This is the closest we came to having a photo  of the green lamandra. It is also the only photo we have that shows the monstrous fig tree we had growing within meters of our house, and the neighbours'. We removed it within a week of getting the keys.  The below photo is when it was all dying off with the help of a considerable amount of roundup.
I'll leave you with one more after to remove that image from your memory! Have you been getting out into the garden lately??

LinkWithin

Related Posts Plugin for WordPress, Blogger...