Wednesday, 9 July 2014

mid year round up

I can't believe we are half way through the year. It really goes SO fast!

In January we made some plans for the house this year, and now is a pretty good time to check in to see how we're going. Like I said then, things happen, life gets in the way, things move up and down priority lists for a whole range of reasons. While I love lists, and find them really useful, I'm not totally attached to them either!
How we put in last weekend-painting our front verandah
    -Build raised vegie beds in the side garden-Done, and we love our veggies! 
    -Build a small retaining wall under the front of the house, (and dig out a whole heap of dirt!) 
     to put in at least 1 water tank for our garden-The digging and wall is done, we will get a 
     tank after the painting is finished and before summer
    -Build another 'feature fence' on the other side of the house near the garage-No
    -Fence the northern side of the block (currently unfenced)-No
    -Built some retaining walls in the back yard-No
    -Turf the back yard-No
    -Paint the rest of the railings-Slowly getting there, the top verandah is done. We will finish the 
     walls, and then get into trim and railings.
    -Refinish the other french doors- No, We will do these in the coming months
    -Fix up some of the windows (peeling paint and putty needing replacing) -Done. Our painters 
     did it! YAY!
    -Look at painting the exterior -Big done! Look at, and actually do it (well, we have the back 
     two verandahs to go, but almost there!)

    -I'd also like to paint the purple lounge and dining rooms, but this may or may not happen this 

     year.
    -I also hope to spend some more time doing some DIYs, including some more sewing, and hang 
    some more art on the walls. A bit less renovating, and a bit more decorating!

Plus, we went on our honeymoon to beautiful Sri Lanka. Love, love, loved it!

Looking like that-it looks like a lot of red. But we moved the house painting up, so the backyard has been put on the back burner. The back yard and the painting were two big and expensive jobs we knew we had to do when we bought. When we looked into it, the paint was still in ok condition, but was starting to dry out and feel dusty. If we had left it another year or two, and done the yard now, it would have needed a lot more prep when we got to it. 

Hopefully we will get to the purple paint this year, but we may be a bit painted out! And, slowly, slowly, I think the decorating is happening. Starting with the downstairs spare room, and we now have our hallway art too. I also have my eye on a few things at the Freedom Sale, and have been sewing this holidays!! I'll show you when I'm done (if it all works out!)! 

How are your plans for the year going?

Saturday, 28 June 2014

guest room mood board

Not too much is happening here, other than painting, painting, painting. We are getting there though, and wall wise we only have the verandahs left. And then some windows, and doors and railings. But we are getting there.

To occupy my mind I have been planning on decorating the downstairs guest room. Until now it was painted in Antique White USA, and had a queen and a single bed in there. Total.
It is quite a big room, has no built in storage at this stage, french doors out onto the bottom verandah, and a window that is also under the verandah. We have guests semi regularly, sometimes for a weekend or for longer stays and it is quite nice that they can be downstairs and have their own space. The single bed is great for the family and friends with kids.

Our guests, as well as coming to see us, also come for the beach, so we want to bring that relaxed, beachy, coastal feel throughout our house and into the guest bedroom, but without screaming Beach!

1. 2. 3. 4. 5. 6. 7. 8. 9.
Some of the artwork and cushions might change a little, (sadly especially the mandala, it might be a little over budget for the guest room, but maybe for our room!) and the bedside tables are definitely white, not pink! We own the drawers, I'm going to have a go at the headboard with some linen. The hat stand is for towels and clothing until we have some hanging storage. Maybe some hooks on the walls would work too. The floor mats are for our wooden floors and to stop sand.

I'm on holidays now-thank goodness!-and we have some visitors coming next week, so I'm going to start the headboard this weekend. Wish me luck!

Monday, 16 June 2014

house painting

It's so exciting to come home from work each day to see what else the painters have done while we've been out at work. And we love how it is looking.

First coat 
First coat-all the rest is the old blue
We wanted to keep the blue, but just tone it down to be more greyish blue. We live within walking distance from the beach, it is our 'beach house', and the blueish colour fit with the relaxed coasty house we have, and life we live. But it's really toned down the bright sky blue that our house was. It doesn't stick out quite as much and it feels like a much calmer colour. And day by day we are painting over the remaining yellow with a nice bright white. It's funny-mostly the blue doesn't look too different until you compare it to another unpainted part, when it is obviously different.

The wall with the window has 2 coats, the wall facing is still unpainted.
You can see some of the new colour just above the railing for a comparison.
We will have the painters for a few more days, and then L and I will keep going on the bits we can do ourselves-the low walls and the verandahs.

Old blue, with our old yellow railings but white eaves
Can't wait to change the rusted lights!
We painted the downstairs front wall through the week, and also the verandah railings white out the back while the scaffolding was up, and are about to start the side.

PS-We also need to replace our hot water heater as of today! GAH! 

Monday, 9 June 2014

painting the railings

We made a last minute decision to paint the upstairs back verandah railings over the long weekend. Even though we LOVED the front ones after they were painted we couldn't get started again. And now the roof had beautiful white paint!


There were 2 major problems, apart from needing to bring ourselves to face painting railings again-they are time consuming and fiddly!
1) The height-it's almost 3 stories up, which made it difficult to paint the far side
2) The railings weren't painted the right way the first time, meaning they weren't properly sealed. Which meant that water had made it in rusting out screws and nails. And potentially rotten wood.


Late last week we realised if we were going to do them, we needed to paint them now while the scaffolding was up. First we gave them a hit with a hammer to see if any of the boards were loose, and screwed any in that needed it, and replaced a few that were a bit too rotten.

While I was at work L scraped out the old rust stained putty, and re puttied the holes.


The next day he  sanded, and put a little paint over the new putty so he could wash the railings down.

Then we painted. We kind of worked together to minimise drips. He did the back and one side, I did the front and the other side.


Gaps
After the first coat had dried L used gap filler to try to minimise more water getting in and tidy up the edges.
No gaps
Eventually we will need to replace these railings due to the water damage, but they should last a few years. We will just keep a close eye on them, and also hope the rust doesn't seep through and stain the putty again!


Before-very old befores!


I won't put an after-our verandah looks like a bit of a bomb site, it's dirty and messy, we still have a hole in the eaves and we haven't painted the walls yet.

*If you are building railings, paint EVERYTHING before you make it. Including the ends. If you make the railing, and then paint it water gets into the gaps and into the bare wood, causing the wood to rot and the screws to rust.

Sunday, 1 June 2014

back to the painting board

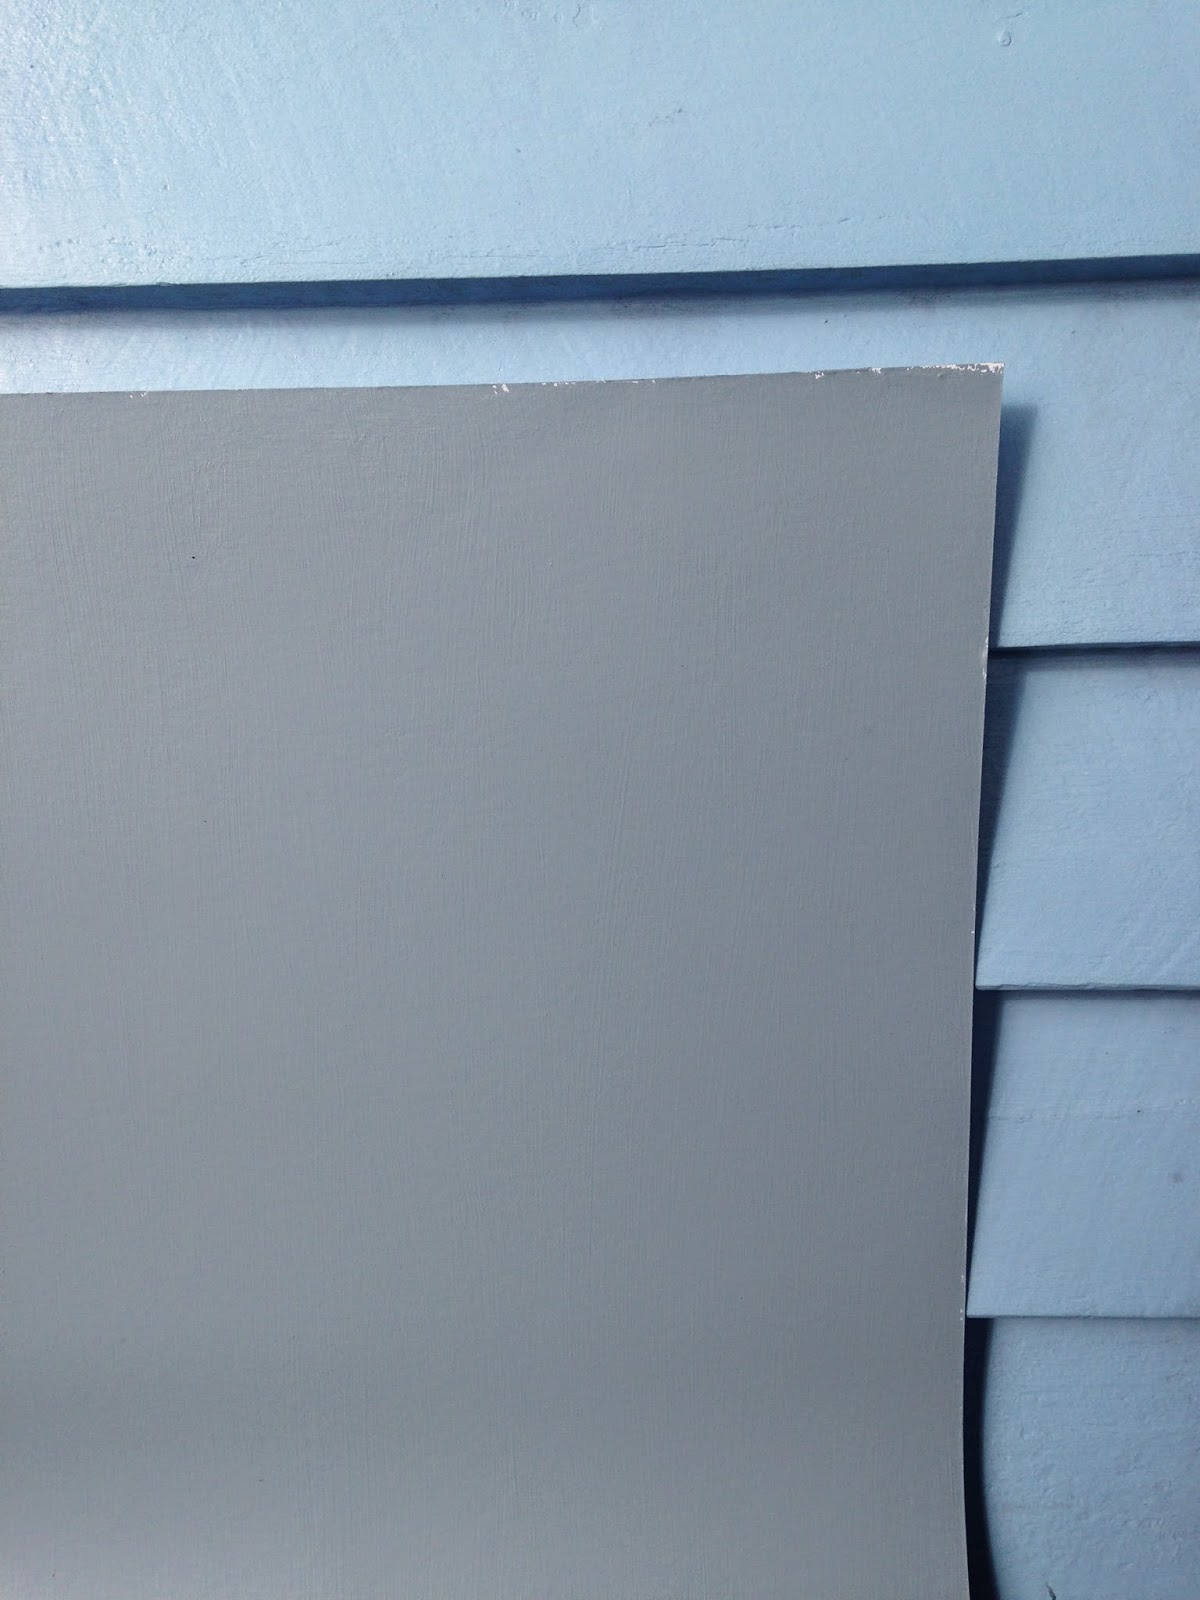
After narrowing down our paint choices we bought a sample pot of Sorcerer by Haymes, but it wasn't right when we put it on a big sheet of cardboard. It had a few drops of red tint added, it was too blue and too bright. It wasn't bad, but it wasn't what we were after. If it wasn't what we wanted on a piece of cardboard, a whole house would have been too much.

This was not too concerning, until the painters told us that they could start in a few days, rather than a few weeks!
We have a colour scheme!! Smokeytone.
Sorcerer was close though, so I went in and spoke to the staff at the local paint shop, who were really knowledgeable and helpful. I looked at the paint cards again, and a lot of the colours were throwing a bit purple or green or too blue. They got out the paint deck for us, and we found Smokeytone, which they didn't have on a card in the display. It looked good, and when they put it into the computer it had only black, blue and white tint. It was sounding good. 

It looks quite grey in comparison to the blue walls, but is blue-grey!
After painting it onto some cardboard we both loved it! We will also be having white and navy trim. No more yellow! Or cream!

I was feeling a bit sick about the colour, it's such a big and expensive decision, but I'm now really excited.
Smokeytone and Sorcerer behind
The scaffolding is up, the most of the walls are prepped (they mostly only needed cleaning, and a few small areas needed some minor sanding), and the painting should start on Monday. 

Our house is a LONG way off being painted-the painters are only doing the high, hard bits. L and I will spend a lot of weekends painting the lower parts and the verandahs, but we have a colour, and one day soonish our whole house will be painted!

*Sorry about the photos-its a grey miserable weekend here, hopefully the weather clears up for our painters.


Monday, 19 May 2014

choosing paint colours

I picked up some paint cards last weekend. Anything that in the shop seemed blueish or greyish, or blue-greyish. But not purplish.
Our starting selection. A lot of choices...
Originally I wasn't too fussed on any of them. None seemed quite right, either too blue, or too grey, or with a greenish undertone. And some are definitely purplish at home. 

But, we may have painters in June, which means we are going to have to pick a colour pretty quickly!
This morning I picked a few that were close and blu-taked them to the wall. Straight away took some off the list.

L and I both thought Pre School by Dulux was ok. Our painter will be using Haymes, so we tried to find the closest Haymes paint. But when we put it into the sun it was washed out and too pale.

Pre school in the daylight. A bit too washed out-it's centre top above
We ended up having to go two shades darker to Sorcerer by Haymes to find one that we liked in the sunlight.
This is in shadow. 


Unfortunately our local Haymes stockist doesn't open on Sundays, so we will pick up a test pot through the week and give it a go. Wish us luck!

What do you think? Any tips on choosing paint colours? 

Sunday, 11 May 2014

the wall

* I wrote this AGES ago, to go with The Hole, but my photos were stuck on the computer!

The slab and the retaining wall were a much simpler process. Especially since we ended up getting a bricklayer to do it for us.

Originally we had planned to lay the slab with the help of a friend, and build a pine retaining wall ourselves. But after researching it we realised a pine wall would only last about 10 years and would then probably need replacing, but a brick wall could last forever. So it was more expensive up front, but it was done right, and wouldn't rot away in the future and need redoing. Also, we were so over that area at the time, and had both gone back to work so it would have taken us multiple weekends. It took the bricklayers 2 mornings over about a week.


They came one day, and laid the slab, let it set for a few days and then came back and built the wall.


We did lay the drainage ourselves between the wall and the soil (side note-there was no drainage laid around our house slab, so when it would rain heavily, or the rain would come the right way, it would lie up against the slab and seep through into the garage. All sorted now, but what were they thinking??).

We lay some agi pipe between the soil and the wall. We made sure it had a slight fall so the water would drain away where we wanted it to go, and then covered it with drainage rock.


So now we are researching tanks at the moment. We are tossing up between a few-maybe 1 big tank, maybe 2 smaller ones that hold more than the 1 big one, not sure. We will put it in before next summer, but after we paint. Eventually we will put a new slab under the hot water system, but we will wait until it needs doing.

It already looks so much better, and tidier. As this is at the front of our house (but below street level-check out the first photo) we think we will plant something to hide the tanks. It will probably be in pots so we can cover up the clay and drainage, and finish the area off.


Wednesday, 7 May 2014

i'm back

Hi lovely readers,

Sorry again for the blogging break. BUT, now we have a new computer (I will try to refrain from tipping a drink into the middl eof this one!!), and L and I are back from our honeymoon in Sri Lanka (what an amazing and beautiful country!).

We are currently meeting with a few painters and getting some quotes to paint the exterior of our house. Next stop-choosing a colour! GAH!

I've been reading all of your blogs lately, but haven't been commenting too much. iPhones are great, but some things are tricky! I've been loving seeing all of your updates!

It's so cold here at the moment, winter has definitely hit with a vengeance (cold for SE Qld anyway), so I'll warm you up with a photo of a beach in Mirissa, on the south coast of Sri Lanka. I've been imaging sitting under those palm trees all week!

Sunday, 23 March 2014

house tour: front verandah

I've shown bits and pieces of our house, but thought I would do a little series of house tour posts. Our photos are currently stuck on our wet computer while we sort out what to do-is it worth fixing it? Get a new one? See if we can buy parts on ebay and get a non apple company to fix it for cheaper… Decisions, decisions.

First up is the front verandah in its entirety.

Since we've been here we've painted the railings white, painted the french door white, sanded and oiled the floorboards, and fixed a small but long term and persistent leak in the eaves, and replace the rotted boards (caused by the leak).

Still to do
· recover cushions on the lounge in a white/natural fabric (or maybe navy?)
· replace the hardware on the doors-it's a bit worse for wear in the harsh, salty conditions
· change lights to non rusted out versions
· replace the missing posts from the railing (they are painted and ready to go, we just need to putty up the existing railings)
· get a small table for the lounge area
· repot the magnolias into a nicer pots
· possibly an indoor outdoor rug under the sitting area
· freshen the windows and front door with a new coat of paint (they look a little tired now the doors and railings are bright white
Plus we are looking at painting the whole exterior this year, so the blue will be changing-probably to a grey or grey blue. When we paint we will also get rid of the yellow facia and eaves (and paint the replaced boards). They will be either white or navy.
For most things we will wait until we have painted. Partly to save up for the expensive paint job coming up, and partly so we are decorating for the finished product.
This is one of my favourite places in the house. It gets gorgeous morning sun, and I love having breakfast out here, or reading and having a tea in the morning. It’s also shady and cool in the afternoon, Great for a nap, reading or drinks with friends.

What do you think?

Sunday, 16 March 2014

Oops

Apologies for being quiet the last few weeks-our computer is out of action. I spilt a drink into our MacBook. Suffice to say it didn't like it. Will be back soon!

Wednesday, 26 February 2014

the hole

Before you start reading-this isn't a pretty post. At all. This is a post about dirt, and digging, and sweat, and tears, and blisters, and more dirt and more digging. Just letting you know.

We've planned to put a water tank in since we moved in, and now that we have built our vegie garden we figured there is no time like the present. We had a bit of a nothing area at the front of the house, it's under the front verandah, and set down quite a way, nothing much grew there, it's where the hot water system lives. 
Right near the start of digging
Near the start. Sorry about the iphone pictures. There was no good
photography happening...
But we had to dig out some dirt so we could lay a slab, build a retaining wall and sort out some drainage. And by some dirt I mean a whole lot of dirt. And by dirt I mean thick, heavy, often rock hard clay. 

For three days 2 or 3 of us dug. Luckily for us L's brother was staying with us at the time and helped us out. We mostly used a pick and shoveled the clay up into a wheelbarrow. The boys then pushed the barrow along the path, and up the driveway. Eventually we did hire a jack hammer for a few hours when the soil got really hard.
Almost done

We threw the dirt up high into the wheelbarrow on top of the path 
Every muscle in my body ached. I grew callouses and blisters. By part way through day 3 I couldn't do any more. I was so exhausted and sore and just started crying. To be fair L didn't ask me to help, I offered. And he didn't think I would actually stick it out. He was pretty proud and impressed I think. 


But we did it, we got it slab and retaining wall ready. I don't think we will look at a shovel for a long time. I'm now using it as a motivation tool when my brain is telling me that I can't go on when I'm exercising or doing yoga, that I'm too tired or too hot or that I can't do that. Now I can tell my brain that I dug a hole for three days, that I lifted shovels of dirt into a wheelbarrow above my head, if I can do that, I keep going, or have a go at any yoga pose. Your body is so much stronger than your mind gives it credit for!! 

Have you ever started a job that you were determined to finish, even though it was so hard?

Sunday, 23 February 2014

sunday thoughts 23/2

A perfect late afternoon swim at the end of last week
Heaven.
Blogger ate this post from last week, and reverted my draft to an old copy. I didn't realise until mid week (crazy week-and oh so hot up here!) Annoying.... Try again this week :) 

read: the latest Home Beautiful. I found something I loved on every page! Sometimes I can be a bit meh, but there were some beautiful houses that were exactly the style I'm aiming for.

create: Order in some of our closed off areas-behind cupboards and in drawers. 


see: our new (second hand) bedside tables. At last! 


taste:  a delicious salad I've eaten about 3 times this week- chickpeas, cucumber, red onion, goats cheese, and best of all-home grown basil and lettuce-with a olive oil and balsamic dressing. Yum!

hear: the wind roaring through the trees


learn: To do things in the mornings. It's my most productive time of day, and if I spend it on the net, or in front of morning tv my day disappears. If I get up, and get on a roll in the morning, I tick so many things off my list of to dos quickly and easily, and I don't feel guilty about having downtime later in the day.


feel: cool at last

smell: rain, not much, but it smells soooo good!


think: that the year is flying. Trying to slow it down by being more present and in the moment. 


watch: Hart of Dixie-so cute and sweet and light. But I am surprisingly emotionally involved in the characters. I was going to wait and watch all of Season 3 when it finished, but after finally catching up on Season 3 of Game of Thrones last weekend, I needed something happy and fluffy and girly-I was numb.


plan: On making a bed head in the near future. Just nutting it all out.


Monday, 10 February 2014

sunday thoughts

read: And the Mountains Echoed by Khaled Hosseini. I'll be sad when this one is finished. He writes amazing characters and beautiful descriptions

create: Curtains for the back shelves in my classroom. Braving the sewing machine again

taste: Homemade banana bread-so good. Plus it really is almost healthy-gluten, dairy and refined suger free! I use coconut oil, and add some protein powder too. Plus sometimes some berries!

see: A grey, misty, enveloping day. So calming

touch: Soft doona, comfortable bed

hear: The Olympics in the background, and L chopping vegies for lunch

learn: To take time out for me after I lost my voice this week

feel: Relaxed after a quiet weekend to rest and rejuvenate

smell: A native gardenia in a bud vase beside my bed. Just amazing

think:  Of the week ahead and of watching a movie this afternoon-perfect weather for it

watch: The Block Fans vs Faves. What an amazing building. Looking forward to the first reveal tonight

plan: Our Sri Lanka honeymoon trip at Easter-any tips? Plus a few days in Singapore. Plus 10 week plans at school

Sunday, 9 February 2014

our vegie patch

One of our goals for this year (and last year, but shhhh) was to do 'something with the side garden'. Last year we pulled out the lamandra (leaving us with a big expanse of white rocks) and built a wooden fence and gate, which I just love.

But now....

L had some time off over the holidays and built 3 raised beds for us. We live on the side of the hill with lots of retaining walls, and have come to realise our soil is terrible. It's thick clay, has little drainage and no goodness. So for us raised beds are the way to go so we can add in some goodness and drainage.

Before: Lots of white rocks, a few big rocks that needed busting up, and lots of pots. 


Compare the size of the rocks to the jack hammer and wheel barrow. Yep

First up was a garden bed made out of treated pine. We just used a few plans we already had that were in pots. The pots in front are lily pillys, waiting to be planted on the other side of the fence. 


Then two big, deep vegie gardens. These were made out of hardwood (treated pine not being a great idea for vegie gardens with the leeching of the chemicals). They aren't quite finished yet, there is a narrower plank to sit along the top of the walls so we can place pots, rest vegies, sit down.


This one has a cover to protect things like lettuce and herbs from the sun, especially when they are young. It's just too hot here for most of the year for them. We will also plant some seedlings into pots to establish them, and then replant into the garden. We lots a few zucchini seedlings early on that way-just too hot!

We have planted herbs, lettuce, kale, tomatoes, capsicum, cucumbers, zucchini to start off with. The stuff we eat a lot of, or the stuff that we buy and doesn't last in the fridge more than a few days (herbs and bags of salad I'm looking at you!).


The trellises on this one will be for zucchinis and cucumbers to grow up, rather than out.

We used used lots of good stuff in our soil to retain water and add in goodies-rock minerals, compost, manure, coconut coir, worm castings, lucern, with some seasol, worm tea and molasses mixed in for good measure. 

Now we just need rain! :) It's a big improvement on my pot vegie patch, but it did teach us a lot about what we should and shouldn't do before we went for the more permanent and expensive beds.

How have your vegie patches been going?

LinkWithin

Related Posts Plugin for WordPress, Blogger...